Make a custom, big button pillow out of scraps!!
I wanted to make pillow for my aunt that coordinated with a quilt I'd done for her a few years ago. After I went into my scrap stash I realized I had plenty to work with! Who says hoarding is a bad thing!!!
I wanted to make use of an existing pillow form but as you can tell it was pretty flat and out of shape.
To remedy that I cut into the cover and plumped it up with batting.
Then I stitched it shut and added a couple drops of E-6000 glue to secure the end of the thread. A little goes a long way and I made sure to use just a dab so there wouldn't be a crunchy spot.
Next I ironed out my scraps, luckily some were large, and then I squared off the edges. I like a nice, crisp cut on certain projects. The pillow form was originally 20X20 but I decided to cut the cover at 18 3/4 inches so it would fit snugly over the form.
I eye-balled the measurement, lined up the sides and stitched them on my machine, using a 1/4 inch seam. Then I cut it to my 18 3/4 inch specifications. I repeated the process for side two.
When I came up a little short I added a strip to the bottom, remembering some of the best advice I've ever heard. "If its too short add some...if its too long, cut some off." Simple, and no stress!
I stitched the front and back together (right sides facing) on three sides and left the bottom open.
A quick press with the iron will set the seam nicely and trimming off the corners decreases bulk.
Next, flip it right side out and give a quick press to the side seams for a crisper edge. I pressed the corners to a sharper point with my seam tool, but a pencil or ruler would work just the same.
Once the pillow is stuffed in tightly (I had to work the funky form a little bit to get an even look) pin the open end closed. I rolled the edges under.
Thread a needle and use small stitches across the side, making sure to secure the thread tightly at beginning and end.
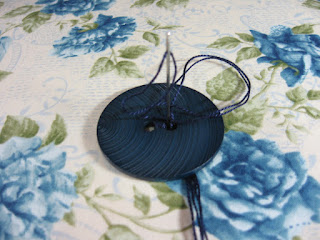
The only items I bought for this project were a doll making needle, two big buttons and coordinating embroidery floss.
Double thread the floss through the needle and loop it through the button, then tie it securely on the back side.
Press down on the pillow while pushing the needle to the other side to make the button sink in. Place the second button on the back side and make sure the needle comes through where it is centered. Keep pressing on the pillow as you run the needle back and forth a couple times. Once it is tight you can let up on the pressure and do a few more loops until you feel its secure. Make sure there is enough thread remaining to cut it from the needle and tie it under the button on the side you end.
Front and back, depending on preference!
Pin It


No comments:
Post a Comment